Posts Tagged :

Tempered Glass

Can Scratched Auto Glass Be Fixed?

How To Deep Clean Your Windshield?

A perfectly cleaned windshield will always appear great. This following write-up will underline steps to restore your windscreen to its factory-finish look if normal cleaning products aren’t working right.

For thorough cleaning of your windshield, look for these 3 basic steps as crucial –

  • You can use regular glass cleaner to clean your windshield.
  • To maintain a clear and protected windscreen, you need to apply rain-repellent.
  • For deep cleaning of the surface, you can clean it with 0000 grit steel wool, glass polish, or a professional glass remover to do the task. 

Basic Steps For Deep Cleaning of Your Windshield

Here are some important steps to give your windshield a perfectly cleaned look –

Step 1: Before cleaning your windshield, you need to get it prepared right. When deep cleaning, make sure to remove any sand or grit that could scratch your glass. Spray the glass liberally with your favorite glass cleaner, then use a microfiber cloth to gently wipe it in a side-to-side motion. And you need to continue until the cloth stops becoming soiled.

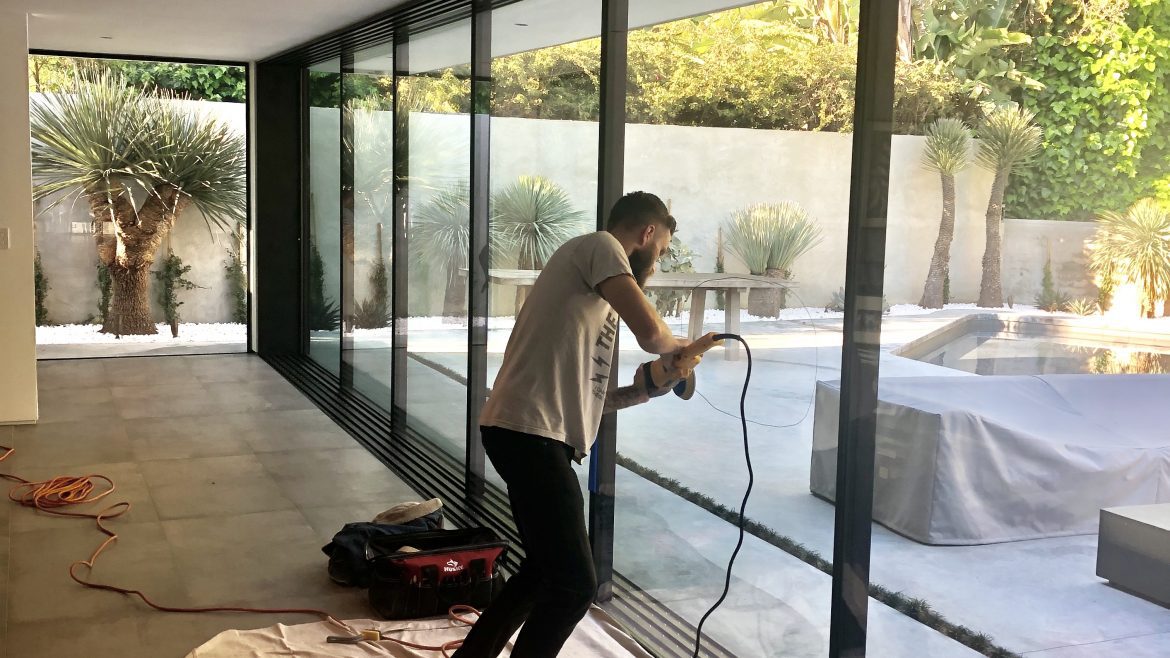
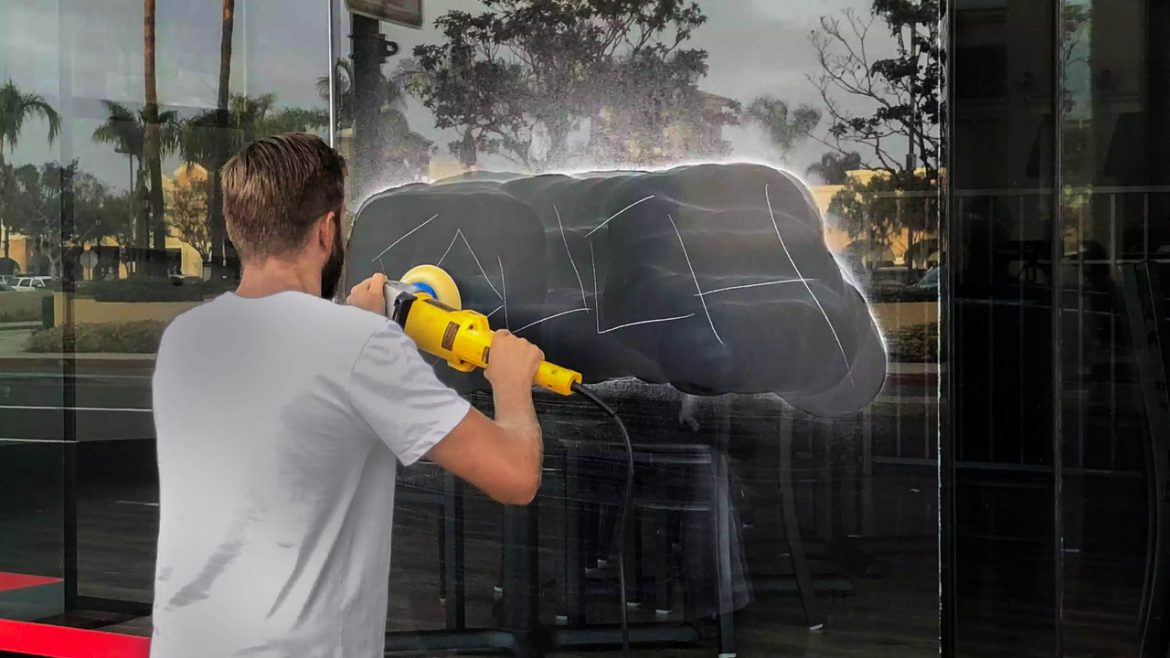
Step 2: It’s time to deep clean and get rid of the toughest grime. To get rid of pollutants (such as – sap, tar, or bug guts), you need specialist equipment. And so, glass polish, a commercial glass stripper, and advanced steel wool are just all suitable alternatives. Once the entire windshield has been stripped to its factory-finish look, you need to work on one small part at a time.

Step 3: The last step is to spray on some repellent ahead of starting your car. The majority of manufacturers will advise you to spray evenly across the entire windshield and wipe it off with a microfiber cloth. But, the directions will vary as per your preference for hydrophobic coating.

When Should Your Windshield Be Deep Cleaned?

The answer is a simple sentence is – whenever a normal glass cleaner is unable to properly clean your windshield. You should prepare to deep clean your car rather frequently if you drive a lot, keep it in a dirty climate, or don’t use any windshield protection coatings as well. The more you drive, the dirtier your windshield becomes. In addition to that, where you park your vehicle is also important to ensure your car is protected. 

You also need to avoid insects, dust, tar, ice, and many other contaminants on the road as they can quickly stick to your windshield. Depending on your climate, you might deal with the same issues year-round and there are even so many things you can do if you drive frequently. Reducing your exposure to these sources of filth can reduce how frequently your windshield needs to be thoroughly cleaned.

Fortunately, it’s simple to safeguard your windshield and lessen how often it needs to be cleaned. You need to apply a rain-repellent coating on your windscreen to achieve this. This makes it easier for water to drain off and stops numerous pollutants from adhering to your glass. Driving is significantly more visible because of the hydrophobic coating, which also prevents substances like wax, bug guts, or tar from adhering to the surface of your glass.

As a result, you end up doing deeper cleaning less frequently, which ultimately saves you time. The following two things happen when you give your glass a rain-repellent coating –

  • helps your glass shed water effectively,
  • stops gunk from quickly building up;

The major reason you need to apply a coating to your glass is to make water run off quickly. And when your windshield is thoroughly cleaned, all contaminants (including wax, tar, residue, sap, soap scum, grime, and others) that are resting on the surface are removed. Your glass ought to be flawless after getting a thorough cleaning.

To keep a crystal-clear windshield isn’t only great, but it’s also crucial to ensure your safety and the protection of others around you. Every windshield can benefit from a concentrated deep clean to eliminate built-up grime after many miles of traveling. Also, cleaning a windshield doesn’t always involve much thought as the steps are simple and offer several advantages. You need to consider giving your glass a deep clean if it no longer looks its best. 

Now that you are in search of a professional to get a perfectly cleaned windshield, you need to look for Glass Polish Service for the best help. Our latest techniques for glass restoration are unique and well-equipped to provide exact solutions to clients within their budgets. It’s 100% safe for your glass, mainly offered to restore your windshield to its original finish, and simple to apply. To find out more about our glass restoration solutions, you can simply contact us at 949-232-7533 today!

How to Polish Glass with a Vibratory or Rotary Tumbler

How to Remove Corrosion from Stained Glass

White mold is a frequent name for stained glass corrosion. It appears on the lead or solder lines, discoloring and spoiling the stained glass item. Flux residue that was not completely removed frequently leads to corrosion or white mold.

Scrubbing the artwork with cleaner is one way to get rid of the corrosion. This will get rid of the corrosion, but it can scratch the glass.

Baking soda may be the greatest solution for cleaning up corrosion. Since baking soda is less abrasive than cleaner, it won’t scratch glass.

A small scrub brush or very fine steel wool is required. First, dampen the steel wool or scrub brush with water. Sprinkle baking soda liberally over the piece after that. Scrub the glass piece vertically, horizontally, and in a circle using the moistened scrub brush or steel wool.

The art glass object should be completely rinsed and dried once all corrosion has been removed with baking soda. You might need to re-patina the object if it has a patina finish. How much corrosion has built up on the item will determine this.

Use a finishing product to polish and protect the art glass item once it has completely dried.

This procedure is quite effective, but it does require effort, time, and repeated finishing. You actually don’t have an option if your stained glass piece has corrosion. For future reference, when building your next piece, make sure to correctly remove flux to prevent corrosion.

Flux is a typical cause of corrosion. Always remove flux from a piece after a few hours. You can use any of the commercial flux removers available. Be careful to adhere to the manufacturer’s directions.

A reliable commercial flux remover is CJ’s. You liberally spray CJ’s on one side of the glass piece as directed by the manufacturer. After cleaning the glass in a circular motion with a light scrub brush, rinse it with water. The other side should then be completed using the same procedure.

You can substitute baking soda and dish soap for industrial flux removers. Sprinkle baking soda on the item first, then lightly scrub it with dish soap. Scrub the item in a circular motion with a gentle, moist scrub brush. Rinse with water, then repeat on the opposite side.

The item should be dried with a soft, clean towel after being cleansed and rinsed with water. Then, let it air dry. Patina can be used when it has fully dried. Applying finishing compound to both surfaces is the final step.

Don’t rush the finishing and cleaning. A thorough cleaning and polishing will save you later time, work, and expense. For quality Glass Polish Services, you can visit https://glasspolishservice.com/.

How to Fix Your Glasses at Home

How to Fix Your Glasses at Home

There are a few reasons why we might need to make little adjustments or repairs to a brand-new or used pair of eyeglasses. When you receive a brand-new pair of glasses, especially if you got them online, the frames may occasionally be somewhat out of proportion with your facial features. Additionally, after years of constant use, a pair of glasses may simply become a little distorted or defective, with a screw falling free. Making the trip to the eye doctor’s office can be a hassle, and to make matters worse, you might be charged for small modifications. While some situations, such as if the lenses are damaged or the frame really breaks, need getting professional assistance right away, others don’t. Here are some pointers for making quick fixes using common items!

Even though this is a tutorial to assist you to fix your glasses should they only need a small adjustment, you still want to be careful not to permanently harm them. Therefore, the best advice is to go right to your neighborhood optical store if your glasses are genuinely broken (or worse, if anything is amiss with your lenses). Any warranty you might have had may no longer be considered valid if you attempt to fix them yourself.

It is quite common for new eyeglass frames to feel a little off-balance after purchase; this is completely acceptable. Plastic frames can also be customized to meet your demands, while metal frames are slightly easier to bend and shape. Put the glasses in warm water to straighten out any slightly wonky frames, and [always] gently bend the temples back into place. You can either set them on the table to see if they are level, but it could be best to compare them to your particular requirements as your face might not be precisely symmetrical.

What if your glasses are old enough to start causing you little issues but you’re just not ready to go out and get a new pair yet? Although the prescription and lens requirements haven’t changed, it feels as though the arms are gradually disengaging. You won’t be required to replace your glasses just yet, so do not worry! Simply grab your smallest flat-head or Phillips-head screwdriver and [again] carefully tighten the screw if one of yours comes loose. Make sure to do this with your glasses fully open and laid out with the arms out. When you try to close the arms after finishing, if you feel that the hinge is too tight, you are probably correct! You should be all right if you try to loosen the screw a little bit. If the issue still exists, try applying a little amount of clear nail polish to the screw before trying the procedure again; similar to glue, the polish will keep the screw firmly in place without causing your glasses any additional harm!

Regardless matter how much money you spend on your glasses; you can’t always assume that they will last. The next time your eyeglasses frames are giving you difficulties, try these solutions and attempt resolving the issue yourself! For quality Glass Polish Services, you can visit https://glasspolishservice.com/.

How to Polish Glass with a Vibratory or Rotary Tumbler

Stained Glass First Aid

Owners of older homes value stained glass’s beauty. In some circumstances, your emotional “cause” for purchasing your home may have been the stained glass windows. But stained glass requires upkeep and care, just like so many other facets of owning an ancient house. The following tips will help you take care of your windows and know when to hire a professional.

A stained glass panel is constructed of:

1. Individually crafted bevels, or pieces of transparent or tinted glass;

2. Held together by a medium of lead came or copper foil.

Leaded glass panels are often put together with lead came, which has been used since the Middle Ages. The prairie architecture of Frank Lloyd Wright and his contemporaries is associated with zinc came. Louis Comfort Tiffany invented the copper foiling technique, which is now the go-to method for creating highly patterned art glass panels and lampshades.

The application of cement to fill the space between the glass and the interior surface of the lead or zinc came is a further stage in the production of leaded glass panels. To weatherproof and strengthen the panel, cement is poured into both its front and back. Large panels should also be reinforced with reinforcement or saddle bars.

Examine your windows for deterioration and buckling. Look for telltale symptoms of metal fatigue and corrosion to see how well the lead or zinc cames are holding up. If the exposed face of the metal (the flanges) can be lifted and smoothed without shattering, old lead is still usable. Lead that has been covered in a fine white powder has oxidized and is no longer functional. Also, zinc covered with small white spots is worn out. Check the metal for hairline cracks close to the joints, especially at the panel’s border. These point to metal aging.

Steel or brass bars are frequently used to brace large or particularly ornate glass panels. To strengthen the window and help hold the weight of the panel, these saddle bars, which are 1/8″ thick by 14″ wide, are secured to the cames and notch into the sash. While others are fastened with twisted copper wires, certain reinforcing bars are soldered to the cames. Using the original technique, the bars should be reattached to the came if they have come loose. A skilled restorer will need to relead bars that have split the came.

Measure the depth of the bulge if it has appeared on the panel. If a single panel is only slightly out of alignment and does not rattle, it should be thoroughly examined but may not need to be repaired. more than 112 panels “must be thoroughly flattened and releaded after being professionally removed from the window.

Verify the glass. It is recommended to repair fractured glass rather than replace it because some older glass is difficult to match. Additionally, not all cracks require repair. Leave the crack alone if it’s little and won’t cause any damage. Call a professional if any of the glass is broken or missing entirely. An on-site repair might be feasible if the panel is large and needs just minor repairs.

Start by taping loose pieces of glass and cames together if you need to transfer the glass to a professional restorer. (Avoid using duct tape!) While the panel is still attached, remove the sash. Lay the panel atop a larger piece of plywood and secure it with tape for more safety. In a wooden box, smaller panels can be wrapped and set flat.

Using a soft cloth and a soap with a neutral pH, clean a sound leaded or copper foiled glass panel. Well-wring out the rag. Abrasive products should be avoided since they can scratch metal or glass. Use only liquid products; avoid sprays and ammonia-based treatments. Ammonia can react with the lead or cement if the liquid gets under the foil or lead came. A moistened #0000 steel wool pad can be used to clean windows in bathrooms and kitchens to get rid of soap scum, grease, and mildew. Use a paste substance like Glass Wax or a stained glass polish, both of which are readily accessible at stores selling stained glass supplies, to polish the glass. Apply the paste with a gentle cloth, let it dry, and then buff.

CAUTION: Lead dust may enter the work area during this operation. To remove any remaining lead, thoroughly wash the panel’s surrounding surfaces (sashes, sill, and floor) with soap and water. Also, put on a dust mask.

Although it is not required, protective glazing can shield your stained glass panel from damage such as a baseball that flies too far. The storm window sash should be made of a material that matches the original sash in order to retain aesthetics. The glazing may be Plexiglas(R) or double strength glass, depending on local construction standards. Be aware that plastic glazing will age and scuff with time. Although Lexan(R), which won’t yellow, is very readily scratched. Although pricey, tempered double strength glass provides the finest protection.

How to Fix Scratched Glass Like the Pros

Cerium Oxide, a rare-earth chemical, has been used for generations by glass artisans to polish and remove minor scratches from all types of glass. They continue to. You can do the same. For straightforward glass cleaning, restoration, and the eradication of scuff, scratch, and stains, no material is more efficient, adaptable, or simpler to use.

In comparison to the majority of pre-mixed polishing compounds now on the market, cerium oxide powder is also less expensive. It quickly turns into a slurry when combined with water, and a little goes a long way. Additionally, if any slurry remains after the job is finished, it is not thrown away. Simply let it dry out before using it again by adding water.

If you’re a skilled do-it-yourselfer, all you need is a little Cerium Oxide, a felt buffing wheel, and an electric drill to attach it to repair mildly damaged windows, tabletops, mirrors, auto glass, or even headlights.

Cerium Oxide will solve the issue if you have dirt on your glass or hard water stains on your shower door that won’t go away with regular household cleaners.

What is a “light” scratch, to begin with? The rule of thumb is that if you can clearly feel a scratch in your glass with your fingernail, it may be too deep to polish out and it is probably not worth the risk to attempt to do so yourself. Cerium Oxide comes to the rescue, though, if you have a cloudy mass of shallow scratches left over from keys or coins.

Online retailers sell cerium oxide and felt buffing wheels with a diameter of roughly three inches. Never forget that you don’t need much. This is how you do it:

  • Use a lint-free cloth or paper towel to thoroughly clean the area you’ll be working on.
  • Get two tiny plastic tubs, about the size of a pint or a quart, and fill one with water.
  • Put the buffing wheel in the water until it is thoroughly damp but not completely drenched.
  • Put a few TBSP of cerium oxide and a little water in the other tub.
  • As you whisk the mixture with a plastic spoon or knife, gradually add more water until the slurry has the consistency of heavy cream. (Checking with your naked finger is absolutely safe, and if there are small particles that don’t completely dissolve, don’t worry.)
  • Your electric drill is required to attach the dampened polishing wheel as you dip it into the slurry.
  • Turn on your drill and place the polishing wheel on the work surface.
  • Keep the pad moving continuously in a side-to-side and circumferential direction.
  • Buff continuously until the slurry is JUST about dry (CAUTION: Be sure not to buff the glass when it is dry. This can cause the glass to overheat and crack.)
  • Wipe off the slurry once it has dried.
  • Simply use the slurry-dampened pad to buff the glass again if you’re not satisfied with how it looks.

All there is to it is that. Remember that the slurry can be kept until it is completely dry and then reactivated simply by adding water. Happy polishing!

How to Fix Your Glasses at Home

What Are The Easy Methods To Get An Scratched Glass Repair?

In case your glass received apparent scratches, you can easily remove using products or chemicals available in your residence. Before trying the below-listed methods to do scratched glass repairs, you must ensure whether it’s just a minor or major scratch on your glass. Because it’s not possible to erase intense glass scratches with easy methods. Therefore, you need to consult professionals to remove major scratches on your glass or get a complete replacement. 

Let’s discuss some easy methods to get minor scratched glass repairs –

  • Application of Clear Nail Polish

This is just a perfect glass restoration method to eliminate minor glass scratches. Allow the time to dry after applying a thin coat of polish to the scratch. If there is any excess nail paint, wipe it away with a cloth while it is still wet. After it has dried, you can remove it with a nail polish remover to check if you’ve succeeded in removing your glass scratches. 

  • Get A Metal Polish

Brasso is a common type of metal polish that you can use to erase glass scratches. Polish the glass surface with a few drops of metal polish on a soft cloth, which you need to repeat once or twice to get the expected result. A metal polish is extremely useful to reduce the visibility of glass scratches.

  • Use A Toothpaste

To fix all your apparent glass scratches, make sure to use non-gel-type toothpaste. Allow the toothpaste to dry on your glass scratches. Once it has hardened, you need to use a towel to wipe away the toothpaste. This approach is commonly used to repair scratched glass on a window or a tabletop.

  • Try With An Armor Etch

This household product is useful to clean scratched sunglasses. It’s also used for etching as well as repairing scratched glass. Apply a few drops to your eyewear with a gentle cloth or cotton ball. After a few minutes, you can rinse the glasses with water to check if your attempt succeeded or not.  

  • Apply Vehicle Cleaning Wax

This is another excellent product to remove minor glass scratches. Polish the scratch with some on a thick cloth. After waxing your glass just a couple of times, the scratches will be totally gone.

  • Use A Mix of Dry Mustard And White Vinegar

You need to make a paste of these two ingredients (white vinegar and dry mustard) to apply on your glass scratches, and allow it to dry. You’re then suggested to wipe away using a cloth once it has dried to check the result. 

  • A Glass Repair Kit

This basic kit to remove glass scratches is commonly available at an auto parts store and is simple to use for repairing apparent scratches with safety. 

Let’s hope you will easily get all the above-mentioned products available at your residence or attempt to purchase them form a nearby shop to perform glass scratches repair. You are also suggested to cover your glass-made products with a protector, which can sometimes prevent all such unwanted scratches. You further need to work very attentively when you are using glass products to retain the look for longer. To keep the beauty of your glass products, make sure to get an immediate glass scratches repair by yourself or consult a professional for the task. 

Now, looking for affordable yet instant glass scratch repair solutions? Then, Glass Polish Service is a recommended name to estimate your issue within 48 hours and can offer the right service on the same-day. Our technicians are ready to quote your glass replacement or repair costs, so you can reach us at 949-232-7533 today!

How To Remove Scratches From Tempered Glass?

How To Remove Scratches From Tempered Glass?

Every parent might want to stay quiet and peaceful, although some children are extremely naughty to perform unwanted acts such as making scratches in Tempered Glass. Mostly, kids tend to break things that are important to get immediate repair or replacement, and sometimes you can easily replace the damage. In case any unwanted scratches on your shower door or glass table-top are your current problem, we are experts to remove scratches from tempered glass. 

So, let’s check out our affordable scratch removal tricks –

  • Examine The Damage

Moderate tempered glass scratches are easy to restore in most cases, without replacing them entirely. To begin with, you need to wipe the glass using a glass cleaner and a soft cloth so you can clearly inspect the damage. If that’s too deep to remove with simple remedies, you are suggested to look for Glass Polish Service to have the best help of experts.  

  • Attempt To Remove Unwanted Scratches

A few compounds are easily available to use as a scratch removal of tempered glass. So, follow the direction of experts to immediately restore the glass without much effort.  

  • Use Toothpaste And A Soft Cloth

Apply a small amount of whitening toothpaste to a soft and clean cloth to start the scratch removal process. In gentle circular strokes, you need to buff the scratched glass. The toothpaste’s grit is plenty to remove minor scratches from the glass. To see what you’ve skilled, you should rinse the glass with water after rubbing it for a while. Repeat twice to get a perfect removal result, and proceed with the next step if the scratch is still visible. 

  • Opt for Steel Wool/ Liquid Pumice Soap Procedure

The best alternative to toothpaste is a liquid pumice soap, which contains more abrasive elements to successfully remove major scratches from tempered glass. You can also use steel wool to remove unwanted tempered glass scratches. Irrespective of what you are using to remove the scratches, you need to buff the scratched glass by rotating your hand in small circular motions for several minutes. Thereafter, thoroughly rinse the glass to check the result. 

  • Buffers

On the last try, you can purchase a commercial buffing compound made with polishing metals to remove scratches on tempered glass. Other popular choice includes jeweler’s rouge or cerium oxide, which need to be applied with a soft cloth to remove unwanted scratches. And now, you should examine the glass scratches after drying and repeat these steps until you are content with the outcome. 

Book A Professional Tempered Glass Scratch Removable Session from Glass Polish Service 

If you aren’t an expert to remove tempered glass scratches alone, a qualified professional at Glass Polish Service can offer the best help for the same. In most situations, we will visit on-site to inspect the damage within 48hours and complete your glass restoration process the same day. Our factory-trained technicians will repair or replace the glass, often saving your money with professional service guaranteed. 

To know more about our glass restoration and scratch removal services, please give us a call at 949-232-7533 today!