Posts Tagged :

Scratches from Glass

Glass scratch remove pits

Frequently asked questions about glass polish service and their answers

Glass surfaces are a popular feature in many homes and offices. However, over time, they can become scratched, stained, or dull, making them less attractive. Glass polish service can help restore the beauty of your glass and protect it from further damage. In this blog, we’ll answer some frequently asked questions about glass polish service to help you better understand the process.

Q: What is glass polish service?

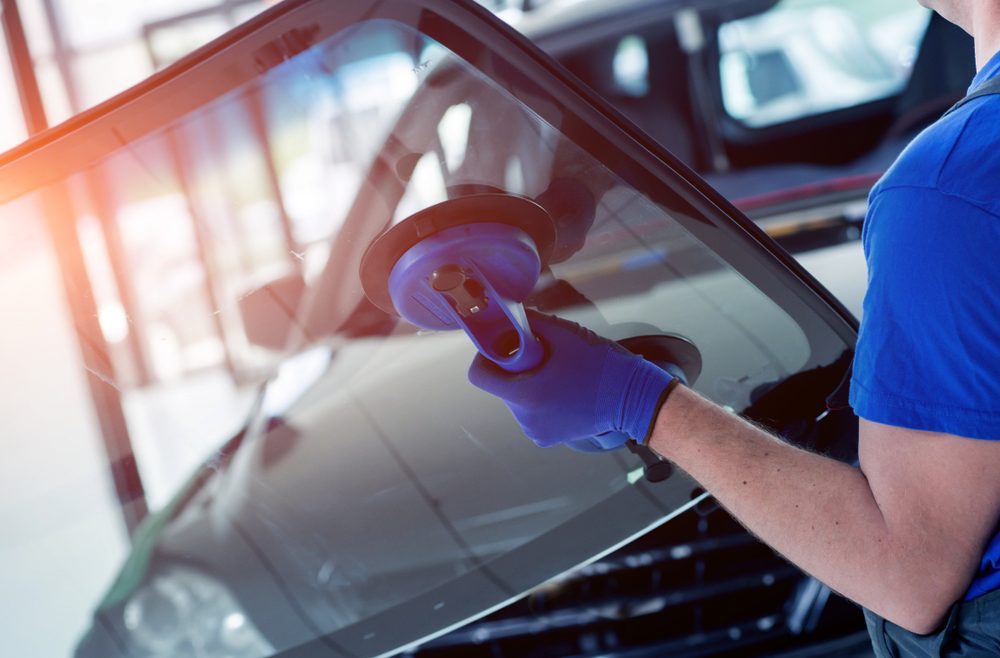
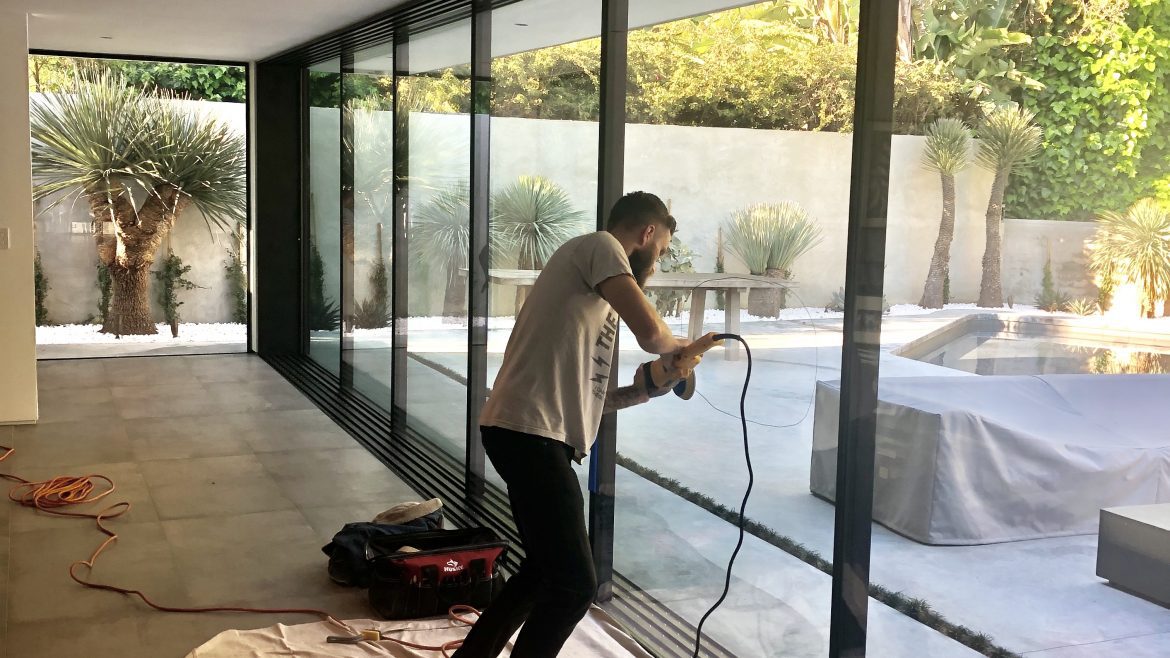
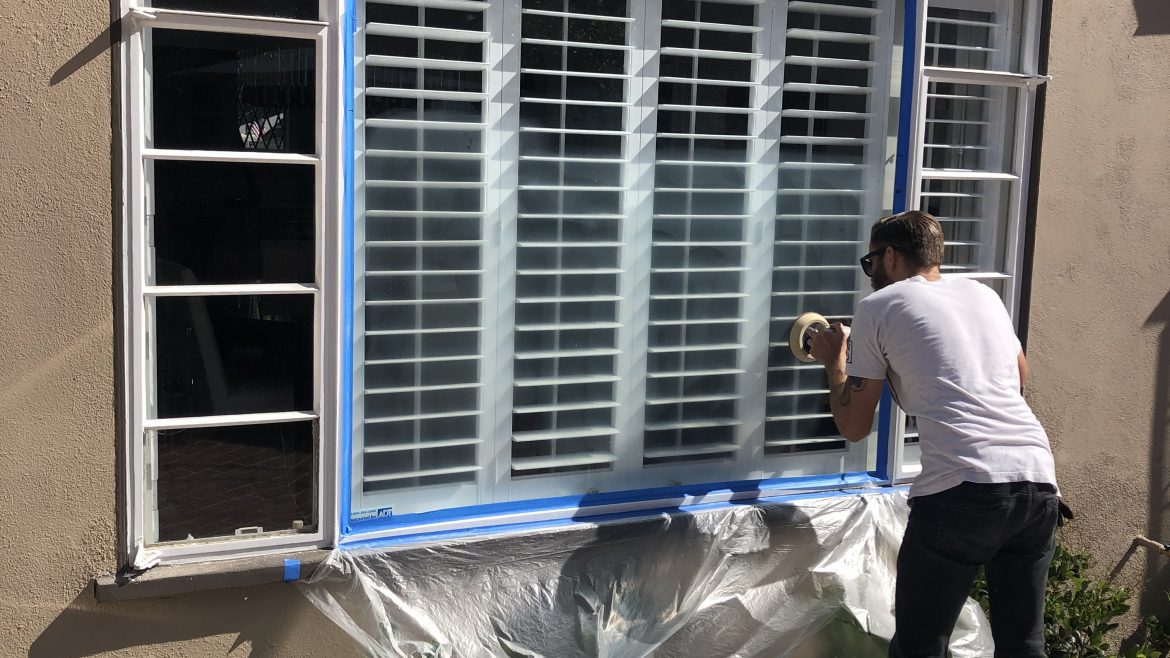
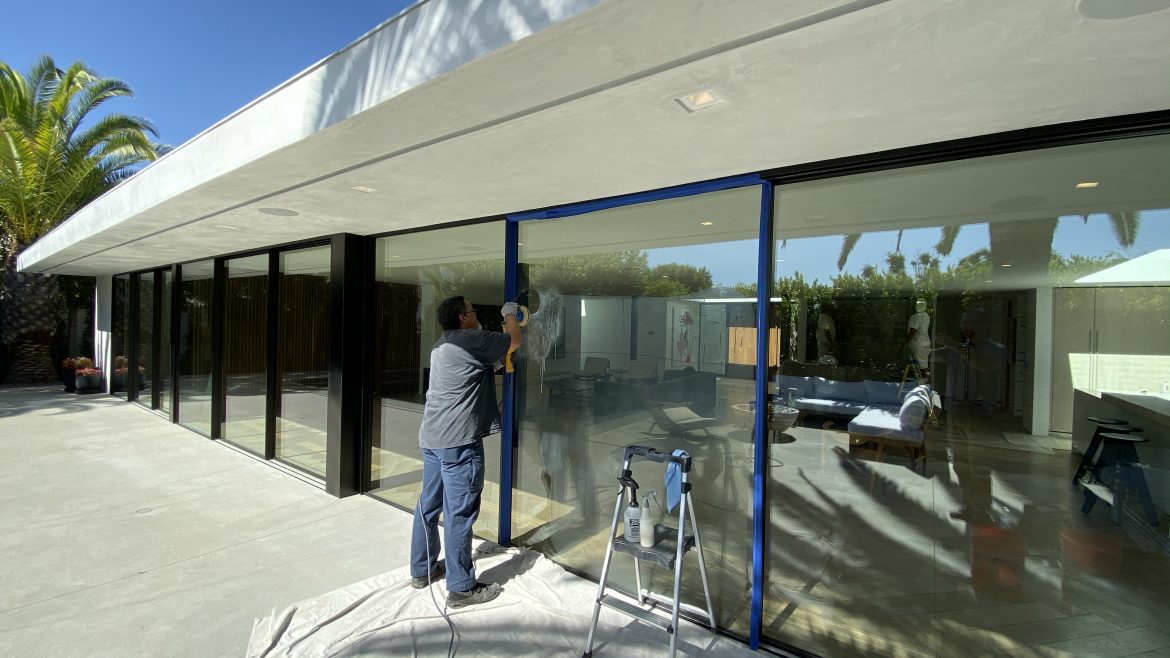
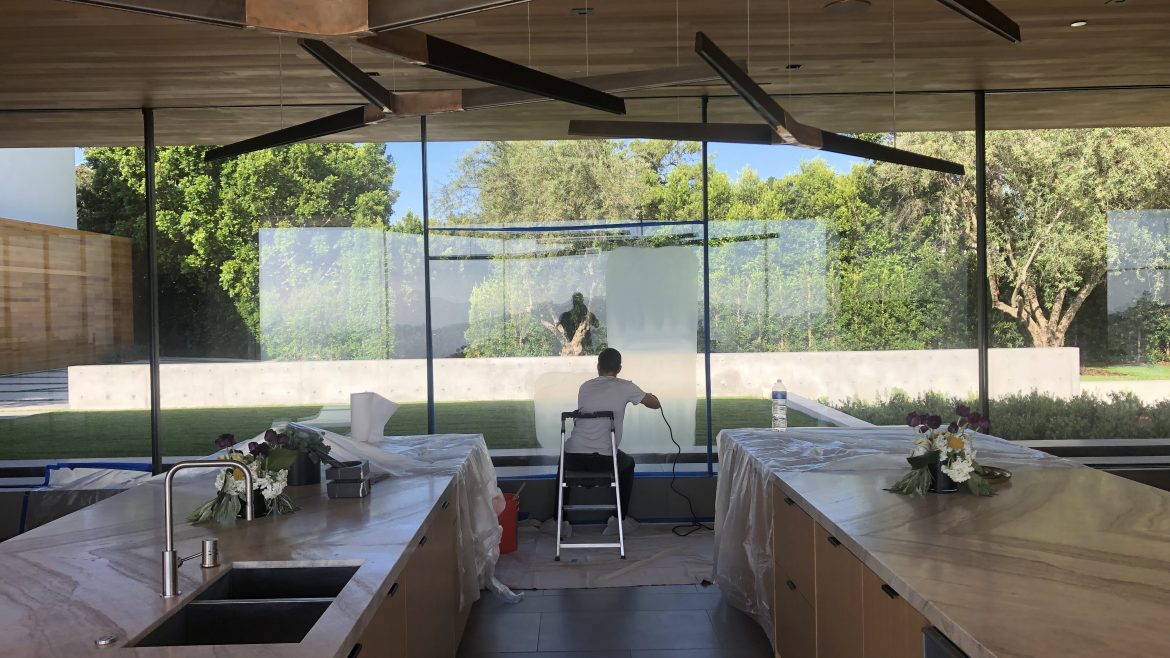
A: Glass polish service is a process that involves restoring and protecting glass surfaces. It involves using special polishing compounds and equipment to remove scratches, stains, and other imperfections from the glass surface, leaving it looking clear, shiny, and new.

Q: What types of glass can be polished?

A: Glass polish service can be used on various types of glass surfaces, including windows, mirrors, shower enclosures, table tops, and more. However, some types of glass, such as tempered glass or laminated glass, may require special techniques and equipment for polishing.

Q: How often should I have my glass surfaces polished?

A: The frequency of glass polish service depends on the type of glass and its usage. Generally, it’s recommended to have your glass surfaces polished every 1-2 years to maintain their beauty and prevent damage.

Q: Can I do glass polish service myself?

A: Yes, you can do glass polish service yourself, but it’s not recommended unless you have the right skills and tools. DIY glass polish service may not achieve the same level of results as professional service, and you may end up doing more harm than good to your glass surfaces.

Q: How long does glass polish service take?

A: The time required for glass polish service depends on the type and size of the glass surface and the extent of damage. Generally, it takes a few hours to a day to complete the process.

Q: Will glass polish service remove scratches?

A: Yes, glass polish service can remove scratches from the glass surface. However, the depth of the scratch will determine the extent to which it can be removed.

Q: Is glass polish service expensive?

A: The cost of glass polish service varies depending on the type and size of the glass surface and the extent of damage. However, it’s generally more affordable than replacing the glass surface, making it a cost-effective option for restoring and protecting your glass surfaces.

Q: How long will the results of glass polish service last?

A: The durability of glass polish service depends on the type of glass surface and its usage. However, with regular maintenance and care, the results of glass polish service can last for several years.

In conclusion, glass polish service is a valuable process that can help restore and protect the beauty of your glass surfaces. If you have any further questions about glass polish service or want to schedule a service, contact a professional glass polish service provider in your area.

Can Scratched Auto Glass Be Fixed?

Can Scratched Auto Glass Be Fixed?

Scratches on your windshield are more than just an inconvenience. It can be dangerous for you, your passengers, and other motorists to drive on the roads while looking through scratch marks or around them for visibility. It’s feasible to mend a scratched windshield without having to replace it if your visibility is obstructed. So, look for the best-in-class glass repair services to get all of your auto scratches fixed. 

Minor Windshield Scratches

In most cases, one can easily repair any minor windshield scratches. Some of them are visible to the naked eye, and your fingernail does not catch when you run it along them. There are even a few quick fixes for these unwanted scratches because they are not severe. 

So, let’s look at some of the basic scratch-removal techniques –

  • Acrylic Scratch Remover

Utilizing an acrylic scratch remover to eliminate auto windshield scratches is possibly the best technique. This liquid helps to fill the scratch cavity when applied, then dries solidly. As they dry transparently, the chemicals fill the scratch and conceal the damage. 

  • Whitening Toothpaste

Your best kit for removing scratches is white toothpaste that contains baking soda. You can simply apply toothpaste to the scratched area and rub it in. And so, you can repeat the procedure as required to remove scratches. Thereafter, you must check to see if the scratch has improved after wiping away the excess toothpaste with a moist cloth.

  • Cerium Oxide

A more extreme remedy is required for deeper scratches, such as windscreen wiper burns or other minor auto scratches. Many kits for repairing auto glass will include cerium oxide as a vital component. When buffing into the glass, this chemical aids in tying the compound to the windshield. Also, cerium oxide is treated with a polishing wheel and is frequently used with jewellery and ceramics. A thick, wool-felt wheel affixed to an aluminium adapter plate makes up the polishing wheel. The wheel typically has a shank that extends from it so that it may be attached to a regular drill. 

Cerium oxide can also be put over the scratched area after being combined with water to create a paste resembling glue. The surface will be gradually smoothed using pressure applied in a scrubbing motion by a drill equipped with a polishing wheel. Cerium oxide can be added while the paste is still wet to create a smooth, scratch-free surface. Hence, you can pick any of the methods to remove unwanted auto scratches.  

Major Windshield Scratches

Your best course of action will depend on the size, depth, and location of the windshield scratch. Make sure to properly replace or fixed them. While most scratches on windshields won’t cause them to splinter or shatter, if the scratch is in the way of the driver’s view, it needs to be fixed immediately. Quickly fixing your windshield may lessen the likelihood of an accident because of vision obstruction. There is no reason to let scratches build up and become a driving danger when there are readily accessible supplies. 

But if you’ve got a scratch that you just can’t remove or that interferes with your ability to drive, Glass Polish Service is ready to offer the best help. We’ll do it if it’s possible to fix the scratch while maintaining the structural integrity of the windshield. But if not, we’ll look into it and let you know your choices. If an immediate windshield replacement is required, it can be done quickly and affordably with us so you can get back on the road. Feel delighted to visit us at www.glasspolishservice.com to explore more about our wide range of glass polish solutions. 

How to Polish Glass with a Vibratory or Rotary Tumbler

How to Remove Corrosion from Stained Glass

White mold is a frequent name for stained glass corrosion. It appears on the lead or solder lines, discoloring and spoiling the stained glass item. Flux residue that was not completely removed frequently leads to corrosion or white mold.

Scrubbing the artwork with cleaner is one way to get rid of the corrosion. This will get rid of the corrosion, but it can scratch the glass.

Baking soda may be the greatest solution for cleaning up corrosion. Since baking soda is less abrasive than cleaner, it won’t scratch glass.

A small scrub brush or very fine steel wool is required. First, dampen the steel wool or scrub brush with water. Sprinkle baking soda liberally over the piece after that. Scrub the glass piece vertically, horizontally, and in a circle using the moistened scrub brush or steel wool.

The art glass object should be completely rinsed and dried once all corrosion has been removed with baking soda. You might need to re-patina the object if it has a patina finish. How much corrosion has built up on the item will determine this.

Use a finishing product to polish and protect the art glass item once it has completely dried.

This procedure is quite effective, but it does require effort, time, and repeated finishing. You actually don’t have an option if your stained glass piece has corrosion. For future reference, when building your next piece, make sure to correctly remove flux to prevent corrosion.

Flux is a typical cause of corrosion. Always remove flux from a piece after a few hours. You can use any of the commercial flux removers available. Be careful to adhere to the manufacturer’s directions.

A reliable commercial flux remover is CJ’s. You liberally spray CJ’s on one side of the glass piece as directed by the manufacturer. After cleaning the glass in a circular motion with a light scrub brush, rinse it with water. The other side should then be completed using the same procedure.

You can substitute baking soda and dish soap for industrial flux removers. Sprinkle baking soda on the item first, then lightly scrub it with dish soap. Scrub the item in a circular motion with a gentle, moist scrub brush. Rinse with water, then repeat on the opposite side.

The item should be dried with a soft, clean towel after being cleansed and rinsed with water. Then, let it air dry. Patina can be used when it has fully dried. Applying finishing compound to both surfaces is the final step.

Don’t rush the finishing and cleaning. A thorough cleaning and polishing will save you later time, work, and expense. For quality Glass Polish Services, you can visit https://glasspolishservice.com/.

How to Fix Your Glasses at Home

How to Fix Your Glasses at Home

There are a few reasons why we might need to make little adjustments or repairs to a brand-new or used pair of eyeglasses. When you receive a brand-new pair of glasses, especially if you got them online, the frames may occasionally be somewhat out of proportion with your facial features. Additionally, after years of constant use, a pair of glasses may simply become a little distorted or defective, with a screw falling free. Making the trip to the eye doctor’s office can be a hassle, and to make matters worse, you might be charged for small modifications. While some situations, such as if the lenses are damaged or the frame really breaks, need getting professional assistance right away, others don’t. Here are some pointers for making quick fixes using common items!

Even though this is a tutorial to assist you to fix your glasses should they only need a small adjustment, you still want to be careful not to permanently harm them. Therefore, the best advice is to go right to your neighborhood optical store if your glasses are genuinely broken (or worse, if anything is amiss with your lenses). Any warranty you might have had may no longer be considered valid if you attempt to fix them yourself.

It is quite common for new eyeglass frames to feel a little off-balance after purchase; this is completely acceptable. Plastic frames can also be customized to meet your demands, while metal frames are slightly easier to bend and shape. Put the glasses in warm water to straighten out any slightly wonky frames, and [always] gently bend the temples back into place. You can either set them on the table to see if they are level, but it could be best to compare them to your particular requirements as your face might not be precisely symmetrical.

What if your glasses are old enough to start causing you little issues but you’re just not ready to go out and get a new pair yet? Although the prescription and lens requirements haven’t changed, it feels as though the arms are gradually disengaging. You won’t be required to replace your glasses just yet, so do not worry! Simply grab your smallest flat-head or Phillips-head screwdriver and [again] carefully tighten the screw if one of yours comes loose. Make sure to do this with your glasses fully open and laid out with the arms out. When you try to close the arms after finishing, if you feel that the hinge is too tight, you are probably correct! You should be all right if you try to loosen the screw a little bit. If the issue still exists, try applying a little amount of clear nail polish to the screw before trying the procedure again; similar to glue, the polish will keep the screw firmly in place without causing your glasses any additional harm!

Regardless matter how much money you spend on your glasses; you can’t always assume that they will last. The next time your eyeglasses frames are giving you difficulties, try these solutions and attempt resolving the issue yourself! For quality Glass Polish Services, you can visit https://glasspolishservice.com/.

How to Polish Glass with a Vibratory or Rotary Tumbler

Stained Glass First Aid

Owners of older homes value stained glass’s beauty. In some circumstances, your emotional “cause” for purchasing your home may have been the stained glass windows. But stained glass requires upkeep and care, just like so many other facets of owning an ancient house. The following tips will help you take care of your windows and know when to hire a professional.

A stained glass panel is constructed of:

1. Individually crafted bevels, or pieces of transparent or tinted glass;

2. Held together by a medium of lead came or copper foil.

Leaded glass panels are often put together with lead came, which has been used since the Middle Ages. The prairie architecture of Frank Lloyd Wright and his contemporaries is associated with zinc came. Louis Comfort Tiffany invented the copper foiling technique, which is now the go-to method for creating highly patterned art glass panels and lampshades.

The application of cement to fill the space between the glass and the interior surface of the lead or zinc came is a further stage in the production of leaded glass panels. To weatherproof and strengthen the panel, cement is poured into both its front and back. Large panels should also be reinforced with reinforcement or saddle bars.

Examine your windows for deterioration and buckling. Look for telltale symptoms of metal fatigue and corrosion to see how well the lead or zinc cames are holding up. If the exposed face of the metal (the flanges) can be lifted and smoothed without shattering, old lead is still usable. Lead that has been covered in a fine white powder has oxidized and is no longer functional. Also, zinc covered with small white spots is worn out. Check the metal for hairline cracks close to the joints, especially at the panel’s border. These point to metal aging.

Steel or brass bars are frequently used to brace large or particularly ornate glass panels. To strengthen the window and help hold the weight of the panel, these saddle bars, which are 1/8″ thick by 14″ wide, are secured to the cames and notch into the sash. While others are fastened with twisted copper wires, certain reinforcing bars are soldered to the cames. Using the original technique, the bars should be reattached to the came if they have come loose. A skilled restorer will need to relead bars that have split the came.

Measure the depth of the bulge if it has appeared on the panel. If a single panel is only slightly out of alignment and does not rattle, it should be thoroughly examined but may not need to be repaired. more than 112 panels “must be thoroughly flattened and releaded after being professionally removed from the window.

Verify the glass. It is recommended to repair fractured glass rather than replace it because some older glass is difficult to match. Additionally, not all cracks require repair. Leave the crack alone if it’s little and won’t cause any damage. Call a professional if any of the glass is broken or missing entirely. An on-site repair might be feasible if the panel is large and needs just minor repairs.

Start by taping loose pieces of glass and cames together if you need to transfer the glass to a professional restorer. (Avoid using duct tape!) While the panel is still attached, remove the sash. Lay the panel atop a larger piece of plywood and secure it with tape for more safety. In a wooden box, smaller panels can be wrapped and set flat.

Using a soft cloth and a soap with a neutral pH, clean a sound leaded or copper foiled glass panel. Well-wring out the rag. Abrasive products should be avoided since they can scratch metal or glass. Use only liquid products; avoid sprays and ammonia-based treatments. Ammonia can react with the lead or cement if the liquid gets under the foil or lead came. A moistened #0000 steel wool pad can be used to clean windows in bathrooms and kitchens to get rid of soap scum, grease, and mildew. Use a paste substance like Glass Wax or a stained glass polish, both of which are readily accessible at stores selling stained glass supplies, to polish the glass. Apply the paste with a gentle cloth, let it dry, and then buff.

CAUTION: Lead dust may enter the work area during this operation. To remove any remaining lead, thoroughly wash the panel’s surrounding surfaces (sashes, sill, and floor) with soap and water. Also, put on a dust mask.

Although it is not required, protective glazing can shield your stained glass panel from damage such as a baseball that flies too far. The storm window sash should be made of a material that matches the original sash in order to retain aesthetics. The glazing may be Plexiglas(R) or double strength glass, depending on local construction standards. Be aware that plastic glazing will age and scuff with time. Although Lexan(R), which won’t yellow, is very readily scratched. Although pricey, tempered double strength glass provides the finest protection.

How to Fix Scratched Glass Like the Pros

Cerium Oxide, a rare-earth chemical, has been used for generations by glass artisans to polish and remove minor scratches from all types of glass. They continue to. You can do the same. For straightforward glass cleaning, restoration, and the eradication of scuff, scratch, and stains, no material is more efficient, adaptable, or simpler to use.

In comparison to the majority of pre-mixed polishing compounds now on the market, cerium oxide powder is also less expensive. It quickly turns into a slurry when combined with water, and a little goes a long way. Additionally, if any slurry remains after the job is finished, it is not thrown away. Simply let it dry out before using it again by adding water.

If you’re a skilled do-it-yourselfer, all you need is a little Cerium Oxide, a felt buffing wheel, and an electric drill to attach it to repair mildly damaged windows, tabletops, mirrors, auto glass, or even headlights.

Cerium Oxide will solve the issue if you have dirt on your glass or hard water stains on your shower door that won’t go away with regular household cleaners.

What is a “light” scratch, to begin with? The rule of thumb is that if you can clearly feel a scratch in your glass with your fingernail, it may be too deep to polish out and it is probably not worth the risk to attempt to do so yourself. Cerium Oxide comes to the rescue, though, if you have a cloudy mass of shallow scratches left over from keys or coins.

Online retailers sell cerium oxide and felt buffing wheels with a diameter of roughly three inches. Never forget that you don’t need much. This is how you do it:

  • Use a lint-free cloth or paper towel to thoroughly clean the area you’ll be working on.
  • Get two tiny plastic tubs, about the size of a pint or a quart, and fill one with water.
  • Put the buffing wheel in the water until it is thoroughly damp but not completely drenched.
  • Put a few TBSP of cerium oxide and a little water in the other tub.
  • As you whisk the mixture with a plastic spoon or knife, gradually add more water until the slurry has the consistency of heavy cream. (Checking with your naked finger is absolutely safe, and if there are small particles that don’t completely dissolve, don’t worry.)
  • Your electric drill is required to attach the dampened polishing wheel as you dip it into the slurry.
  • Turn on your drill and place the polishing wheel on the work surface.
  • Keep the pad moving continuously in a side-to-side and circumferential direction.
  • Buff continuously until the slurry is JUST about dry (CAUTION: Be sure not to buff the glass when it is dry. This can cause the glass to overheat and crack.)
  • Wipe off the slurry once it has dried.
  • Simply use the slurry-dampened pad to buff the glass again if you’re not satisfied with how it looks.

All there is to it is that. Remember that the slurry can be kept until it is completely dry and then reactivated simply by adding water. Happy polishing!

Glass Window Scratch Repair – Can You Do It Yourself?

Is that feasible to repair glass window scratches? This common question is on everyone’s mind, especially if you want to get an instant glass window repair service. Once you’ve got scratches on your glass window, now what is the next step? Should you ignore those window scratches until the entire window is eligible for a replacement, or should you take immediate action now?

Fortunately, there are several easy steps to repair minor glass window scratches yourself. It’s better to avoid activities, which can result in window scratches. However, it is much easy to say and complex to do that. So, let’s find out the right steps to repair glass window scratches yourself, which will make your work much easy. 

Easy Steps To Repair Glass Window Scratches: 

Doing minor repairs to glass windows is quite simple. Read on the right steps to repair your glass window scratches and enjoy savings –

  • Begin With Surface Cleaning

The first step is to get systematically clean the surface. You can use a soft cloth and glass cleaner to get a proper surface cleaning. After the cleaning is completed, you need to recheck scratches and if you cannot feel them, they’re repaired at home.

  • Apply Toothpaste And A Clean Cloth For Window Scratch Repair

For the next step, you will require a whitening toothpaste that helps to offer an excellent result. You need to rub the glass windows with a soft cloth and a small amount of toothpaste. In order to cover each glass window scratch, you need to rub it in a circular motion. Rubbing thoroughly for a minute or so is much more effective in repairing minor glass window scratches, now rinse the glass to inspect. Repeat this step if it was effective, or else you need to move to the next repairing step. 

  • Liquid Pumice Soap Is Quite Helpful

If the toothpaste doesn’t work right in your case, you need to choose a pumice soap to get an easy glass window repair. Because pumice soap is meant with extra abrasive to remove a wide range of glass scratches. And so, you need to apply pumice soap on the scratches using a circular motion and rinse with water to check. Doing this for a minute or so will surely enable you to repair minor scratches yourself, and still, if the scratches are visible, you need to consult an expert to get affordable repairs. 

  • Use A Commercial Buffing Compound To Buff Your Glass Windows

It’s helpful to get a commercial buffing compound, which is used to polish metals or erase glass scratches, along with a buffing wheel to perform the task. After doing the buffing for a while, you need to rinse the surface using a wet sponge to get the expected results. By doing so, you can guarantee that the glass won’t dry up and you can stop it from getting any more scratches. After a short while, wash the glass in water and liquid soap to evaluate the outcome. You can repeat the process if you find that the scratches are less noticeable. Meanwhile, it’s necessary to seek professional assistance if the scratches appear to have not improved at all.

Hire An Expert To Get The Best Glass Window Scratch Repair Solutions

Based in Orange County (California), Glass Polish Service is a popular name to offer an exact glass window scratch repair solution and on-site estimate of your problems to give an affordable restoration the same day. We have the best team to help with restoring or repair of all the scratches on your glass windows or other surfaces. Having years of expertise and the right tools to guarantee an affordable repair or replacement to all of our clients, you can anytime consult us to get immediate support. 

So, feel delighted to dial us at 949-232-7533 for a consultation and we will visit your site at the earliest. Call today!

How to Polish Glass with a Vibratory or Rotary Tumbler

Can You Remove Scratches Out of Glass Windows?

In today’s home décor, exclusive-made glass windows will include a sense of glory in your space. They help for lighting and ventilation, along with making your space appear extremely gorgeous and clean. That’s impossible to ever imagine a room without windows, right? A house looks dazzling because of its giant size glass windows, although the glass itself isn’t beautiful for long. From scratches to cracks and water stains, glass windows need to endure everything, so an improper cleaning step can also damage them. 

The basic techniques listed below helps to learn the steps to remove glass window scratches. All the following steps only require common household items and don’t require any special safety measures –

  • Beginning With Analysis of Window Scratches

The first step in glass window repair is to examine if the damage is minor or severe. The basic techniques should only be used for minor scratches. So, hiring a professional is mandatory to remove severe glass window scratches. By touching scratched areas, you can understand its depth. You just can’t mend a scrape on yourself if you can sense it with your fingernails. Although you can simply proceed to work on it at minimum costs if your scratches are minor. 

  • Cleaning of Glass Windows

Ahead of starting with glass window scratch removal, you need to properly clean it to get a crystal-clear appearance. In order to get rid of all the stains, dust, and debris, you must be careful. A thorough cleaning will typically make minor scratches appear unnoticeable.

  • Toothpaste And A Clean Cloth Are Required

If you wonder about the right steps to clean or remove glass window scratches, you can simply go with a perfect old toothpaste remedy. So, let’s find lint-less cloth to apply a generous amount of toothpaste to one side, and start rubbing in circular motions over scratches. Once you’ve completed rubbing, you need to wipe off the toothpaste and clear your glass window. This technique is perfect to repair everyday or minor scratches. 

  • Try With Baking Soda

Using baking soda instead of toothpaste is also a great idea. For this method, you need to prepare a paste of baking soda and water to apply gently in a circular motion on the glass surface. Let’s hope it will enable you to remove glass window scratches without much investment. 

  • Apply Metal Polish For Double Glazed Glass Windows

For double-glazed glass windows, you must use a metal polish to remove scratches easily. That’s right, metal polish is indeed good compared to home techniques. And so, you need to invest in non-abrasive glass polishing agents (such as – cerium oxide or iron oxide) to get an excellent result. You further have to continue glass polishing with a metal polish until all the scratches are removed. 

Its Time To Hire Experts From Glass Polish Service For Tough Glass Scratches Removal

Located in Orange County (California), Glass Polish Service is a renowned name to offer specialized glass repairing solutions at affordable charges. In most situations, we are ready to visit on-site and estimate your situation to offer a complete and exact solution within 24 hours. From budget-friendly glass scratch repair to graffiti scratches, and window cleaning scratches, we’ve got you covered with everything related to major and minor glass repair. 

So, feel free to call our experts at 949-232-7533 today for the best help!

How to Remove Scratches from Glass

Many of you want to know how to remove scratches from glass and gemstones, and we frequently get requests for a glass scratch remover. Continue reading to learn about a few methods for removing scratches from glass.

Please be aware that the methods and tools suggested in this article do not work for windshield or tempered glass scratch repair. These must be replaced or given professional guidance since the glass may break or obstruct the vision (as in the case of a windshield)

Option 1: Diamond Polishing Paste

Our favorite technique for eliminating scratches is diamond paste, which is a great abrasive. If properly applied, diamond polishing paste will restore your material’s surface to its initial condition.

Microns () are used to measure diamond paste.

What grade of paste to use will depend on how deep the scratch is. For example, a particularly deep scratch requires a coarser paste to start, followed by finer pastes, until the appropriate surface smoothness is reached.

A few different grades should ideally be available in your workshop so you may start by removing the mark with the coarser one, such as a 6 micron grade, and then fine polish the scratch back to its previous state with a 3 micron or 1 micron grade.

It will take a lot longer to perform its magic if you only use one grade of paste, let’s say a 1 micron, but if your scratch is particularly deep it will ultimately be eliminated if you have patience.

Option 2: Cerium oxide

Cerium oxide glass polish is a powder that must be made into a paste by combining it with warm water.

Diamond paste must be used in place of mineral powder if your scratch or mark can be felt with your fingernail since the mineral powder is meant for markings, imperfections, and brilliant cleaning of glass surfaces.

Option 3: EVE Diapol Diamond Polishers

These durable, mess-free diamond polishers may be used in three steps to quickly produce a high-quality surface.

There are 3 colors/grades available:

  • Green: Medium-sized shaping, reducing, and eliminating (about 35 microns).
  • Gray: Pre-polish and smoothing (Fine), about 4 to 8 microns
  • Pink: High Lustre polishing (Extra Fine), 1-2 microns, approximately.

Use the 3mm Pin Mandrel with the Pointed Pin form and the required screw mandrel with your wheel and knife edge polishers. They are intended to be used with these precisely. The polisher might fracture or fly off when using different mandrels. Use at the suggested 7,000–10,000 RPM speed range.

Option 4: Mini Rubber Silicone Polishers

Use a rubber silicone polisher mounted on a mandrel attached to your Dremel or other rotary hand drill as a second option. You should only use these polishers on extremely light markings since they will remove material. As we previously stated, diamond paste must be used in its place if the scratch or mark can be felt with the fingernail.

Conclusion

So these were some of the options to remove scratches from glass. You may have heard that another solution for removing scratches in glass is toothpaste. However, toothpaste is a remarkably mild abrasive that is better reserved for teeth as it will only cover the scratch mark. You can get in touch with Glass Polish Service for all your glass polishing needs.